
Unraid
Spokes can be deployed seamlessly on your Unraid server. Spokes is available directly in the Unraid Community Applications store.
Deploying via Community Applications
Section titled “Deploying via Community Applications”Using the official template is the easiest and most reliable way to run Spokes on Unraid. It pre-configures all necessary ports, paths, and environment settings.
Installation Steps
Section titled “Installation Steps”- Log in to your Unraid Web UI.
- Navigate to the Apps tab in the main header.
- Search for Spokes and click Install. You can also view the template on the Unraid App Store.
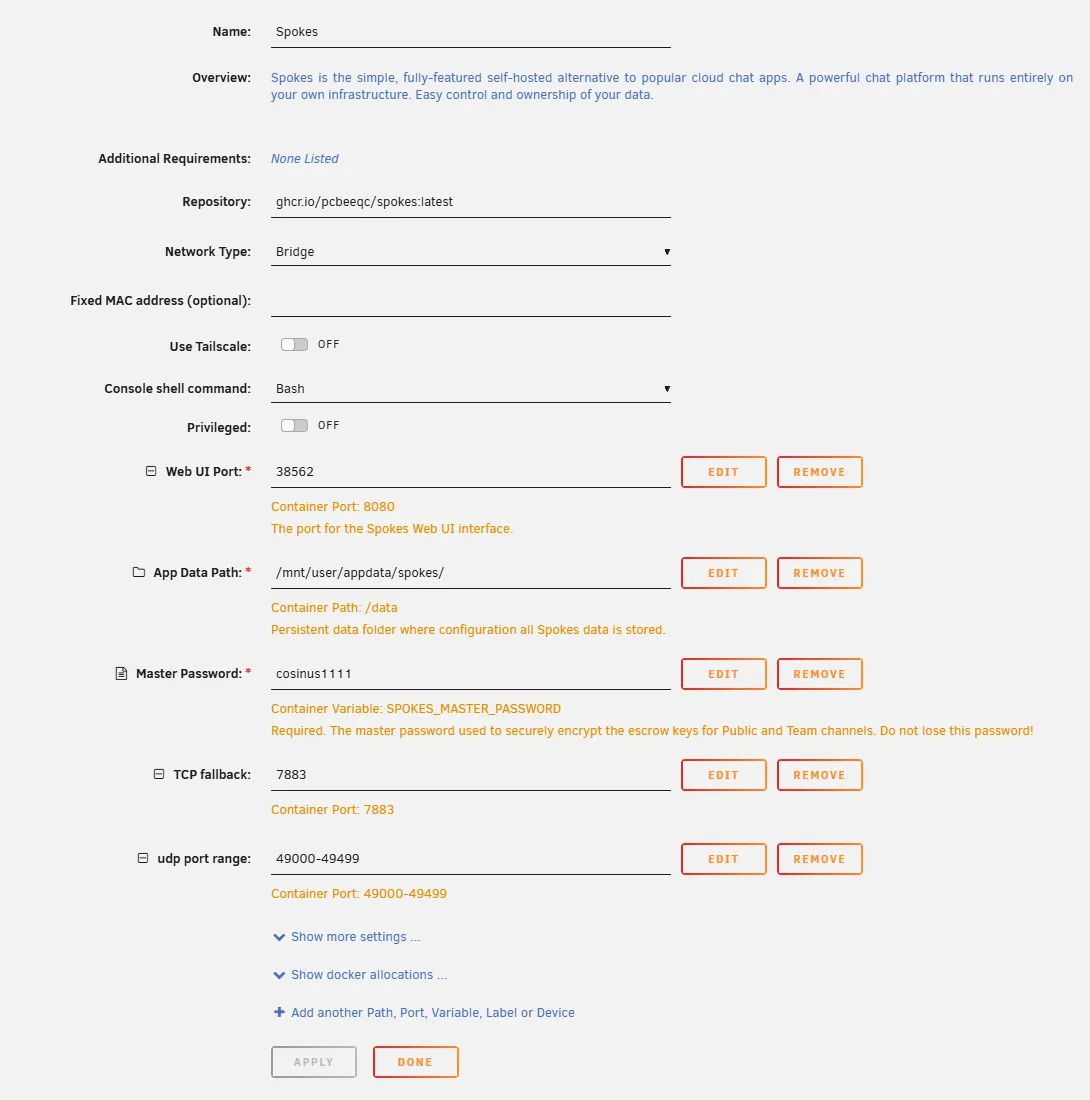
- The container configuration page will open with the settings pre-populated:
- App Data Path: By default, this maps to
/mnt/user/appdata/spokes/on your host. Change this if you prefer a different storage path. - Master Password (
SPOKES_MASTER_PASSWORD): Enter a secure, randomly generated password. This is required to encrypt database credentials and keys. - Web UI Port: Mapped to host port
8080by default. You can change this if port8080is already in use.
- App Data Path: By default, this maps to
Configuring Voice Ports (LiveKit)
Section titled “Configuring Voice Ports (LiveKit)”By default, the template maps the Voice TCP port to 7881 and the UDP range to 30000-30499. If you need to change these, you must delete the original mappings and create your own. Unraid does not allow you to edit the container port on an existing template mapping.
- Click “Remove” on both the Voice TCP Fallback Port and the Voice UDP Port Range.
- Click Add another Path, Port, Variable, Label or Device to add them back with your custom ports.
- Scroll to the bottom and click Apply.
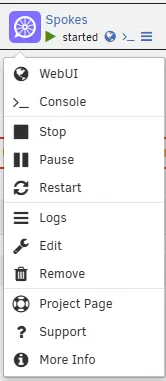
Unraid will download the Spokes container image and start the application. Once finished, navigate to your Docker list, click the Spokes icon, and select WebUI (or visit http://<your-unraid-ip>:<Web-UI-Port>).
Deploying Manually (Fallback)
Section titled “Deploying Manually (Fallback)”If you prefer to configure the Docker container manually without the template:
-
Open your Unraid Web UI and navigate to the Docker tab.
-
Scroll to the bottom and click Add Container.
-
Toggle the Advanced View switch in the top right corner.
-
Configure the basic container settings:
- Name:
Spokes - Repository:
ghcr.io/pcbeeqc/spokes:latest - Network Type:
Bridge
- Name:
-
Scroll down and click + Add another Path, Port, Variable, Label or Device to add each of the following mappings:
1. Web UI Port
Section titled “1. Web UI Port”- Config Type: Port
- Name:
Web UI Port - Container Port:
8080 - Host Port:
8080(or your preferred Web UI port) - Connection Type:
TCP
2. LiveKit TCP Fallback
Section titled “2. LiveKit TCP Fallback”- Config Type: Port
- Name:
Voice TCP Fallback Port - Container Port:
7881 - Host Port:
7881 - Connection Type:
TCP - Note: This must map 1-to-1.
3. LiveKit UDP Range
Section titled “3. LiveKit UDP Range”- Config Type: Port
- Name:
Voice UDP Port Range - Container Port:
30000-30499 - Host Port:
30000-30499 - Connection Type:
UDP - Note: This must map 1-to-1.
4. App Data Path
Section titled “4. App Data Path”- Config Type: Path
- Name:
App Data Path - Container Path:
/data - Host Path:
/mnt/user/appdata/spokes/ - Access Mode:
Read/Write
5. Master Password Variable
Section titled “5. Master Password Variable”- Config Type: Variable
- Name:
Master Password - Key:
SPOKES_MASTER_PASSWORD - Value:
YourSecureMasterPasswordHere
-
Click Apply at the bottom of the page to download the image and start Spokes.
Next Steps
Section titled “Next Steps”Now that your Spokes container is running, it’s time to secure it and configure your network:
- Reverse Proxy Setup: Expose Spokes securely via HTTPS using Cloudflare Tunnels or Nginx Proxy Manager.
- Network Routing: Configure port forwarding for LiveKit voice and video.
- The Setup Wizard: Complete the initial configuration and set up your identity provider.